Apogee ALTA drivers for Mac OS X

This distribution contains the drivers and associated packages for Apogee Instruments series of Scientific CCD cameras.
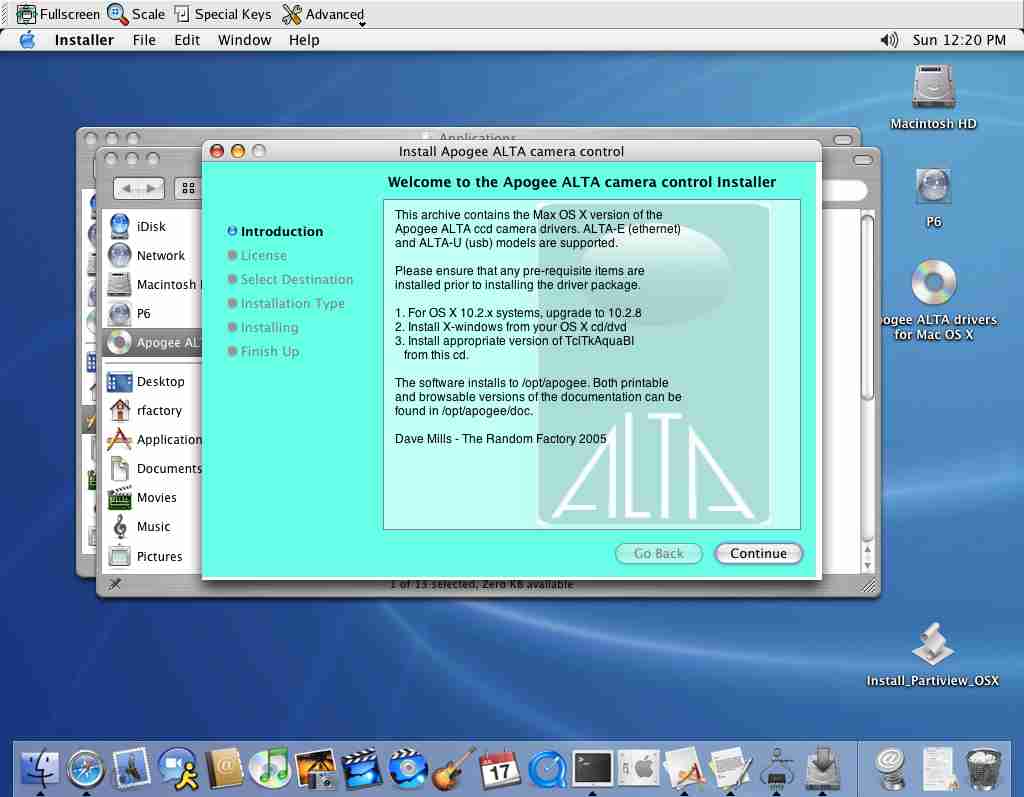
Both ALTA-E (Ethernet interface) and ALTA-U (USB interface) models are supported.
ALTA-E is supported on any OS X release 10.1 or greater.
ALTA-U is supported on any OS X release 10.2.8 or greater.
Upgrading to the latest version of your release is recommended.
The following packages are included in this distribution :
apogee-driver-1.5.pkg – Previous release for PPC Macs only
apogee-driver-1.7-osx-ppc.pkg - The driver and GUI interfaces PPC Macs
apogee-driver-1.9-osx-ppc.pkg - The driver and GUI interfaces PPC Macs
apogee-driver-1.7-osx-intel.pkg – The driver and GUI interfaces for Intel Macs
apogee-driver-1.9-osx-intel.pkg – The driver and GUI interfaces for Intel Macs
celestia-osx-1.4.1.dmg - A fully featured star-chart package
external-packages.tar - The sources for component packages (for developers)
Java1.4.1.dmg.bin - Java JRE for use with starjava
Java3D_and_JAI.dmg - Java imaging extension for use with starjava
starjava.jar - Starlink astronomy packages
TclTkAquaBI-8.4.7.0jaguar.dmg - Tcl/Tk for jaguar (10.2.x)
TclTkAquaBI-8.4.7.0panther.dmg - Tcl/Tk for panther (10.3.x)
TclTkAquaBI is included in default installations of Tiger (10.4.x)
X11UserForMacOSX.dmg.bin - X-windows runtime distribution (10.3)
X11User.pkg - X-windows runtime distribution (10.4)
The image display component used is the SAOIMAGE DS9 program. This program requires an X-windows environment. Your OS X distribution cd's should contain a version , but we include a copy here for your convenience, just in case you did not select it during your OS installation.
Install the X-windows package first
Choose a convenient location to unpack the archive
Double-click on the X11 metapackage icon
Agree to the license and select a destination volume,
installation should then proceed.
The graphical user interface is built using the Tcl/Tk scripting language. Your OS X distribution includes a limited version but we recommend you install one of the more comprehensive versions included on this cd (unless you are running 10.4 or later which includes TclTkBI). Select the appropriate version according to your version of OS X.
Install the TclTkBI package second
Installation requires root priviledges, so enter the admin password for your system.
This package contains the drivers and GUI's.
Install the drivers package third
Agree to the license
Select an installation volume. It is recommended that
you
accept the default location of /opt on the root Volume.
If you
choose another location then you must issue the following
command
in a terminal session after installation completes.
sudo ln -s /where-ever-you-installed /opt
Installation requires root priviledges, so enter the admin password for your system.
Once all the requisite packages have been installed, the following steps are required to configure the drivers :
Start the X-windows program, this should result in one or more "Xterm" windows.
Select an xterm window and type /opt/apogee/runmefirst
Select the correct Apogee camera type from the dialog
For an ALTA-E model , the system will now search for your camera (see ALTA-E section below).
A "startapogee" script will be created in your home directory.
The X-windows icon will most likely appear either on the
Desktop
or in the Applications folder, double-click to start
Depending upon wether you are using the Apple provided X11
release
or the X-Darwin version, you may or may not see the next
screen.
Once X is running you should see at least 1 Xterm window.
In
that window type the /opt/apogee/runmefirst command.
In the dialog
that appears, select the appropriate config file
for your camera
type (alta_net.ini or alta_usb.ini), click "Open".
For ALTA-E models the system will now start searching for
your
camera, so make sure it is powered on , and connected to
your
ethernet switch.
For ALTA-U models you can check that the Mac OS can detect
your
camera using the "System Profiler" tool.
The normal procedure for using the ALTA package is to start the X-windows environment, and then type
./startapogee
into an xterm window. This will start the GUI, and the default image viewer (DS9).
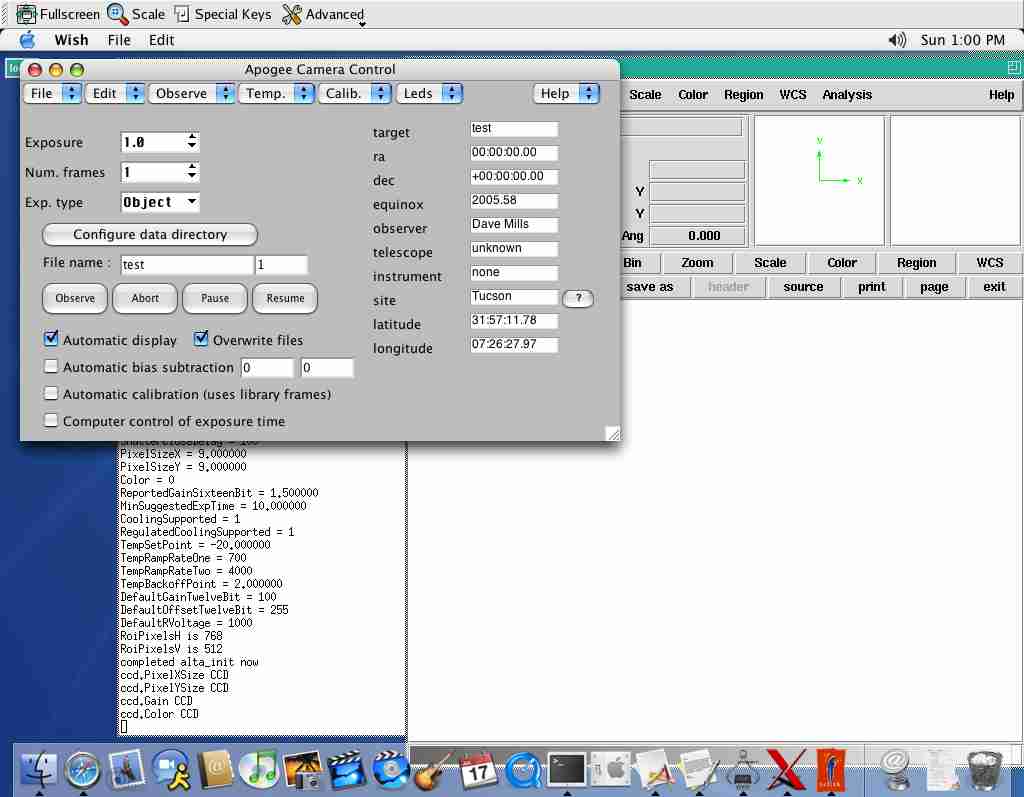
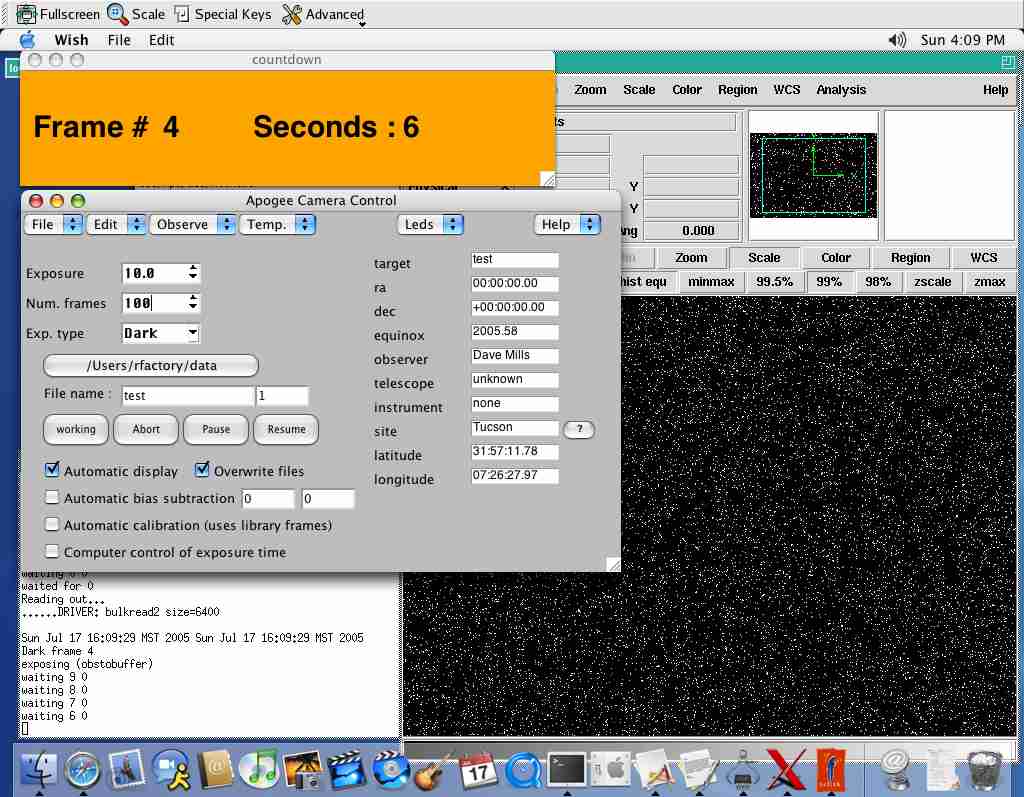
Select "Dark" frames from the menu, and check the
"Overwrite files"
checkbox. Change the exposure time to
10 (seconds).
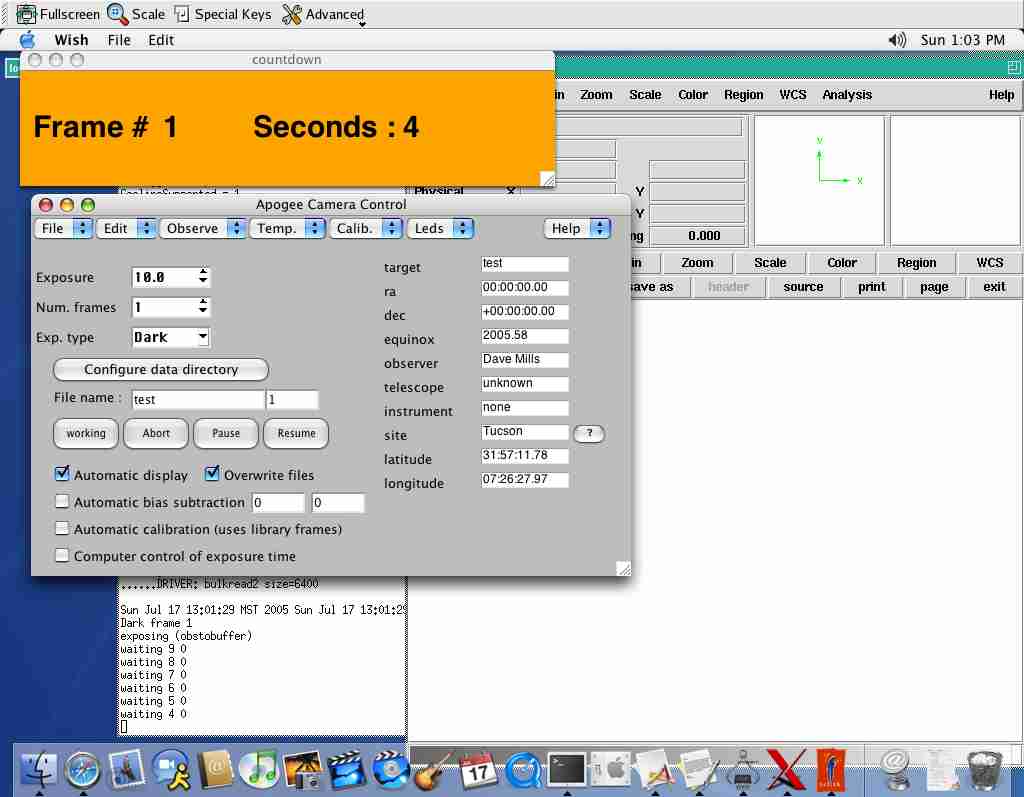
Now click "Observe".
A small countdown window will appear (it may be hidden by
the
main GUI window)
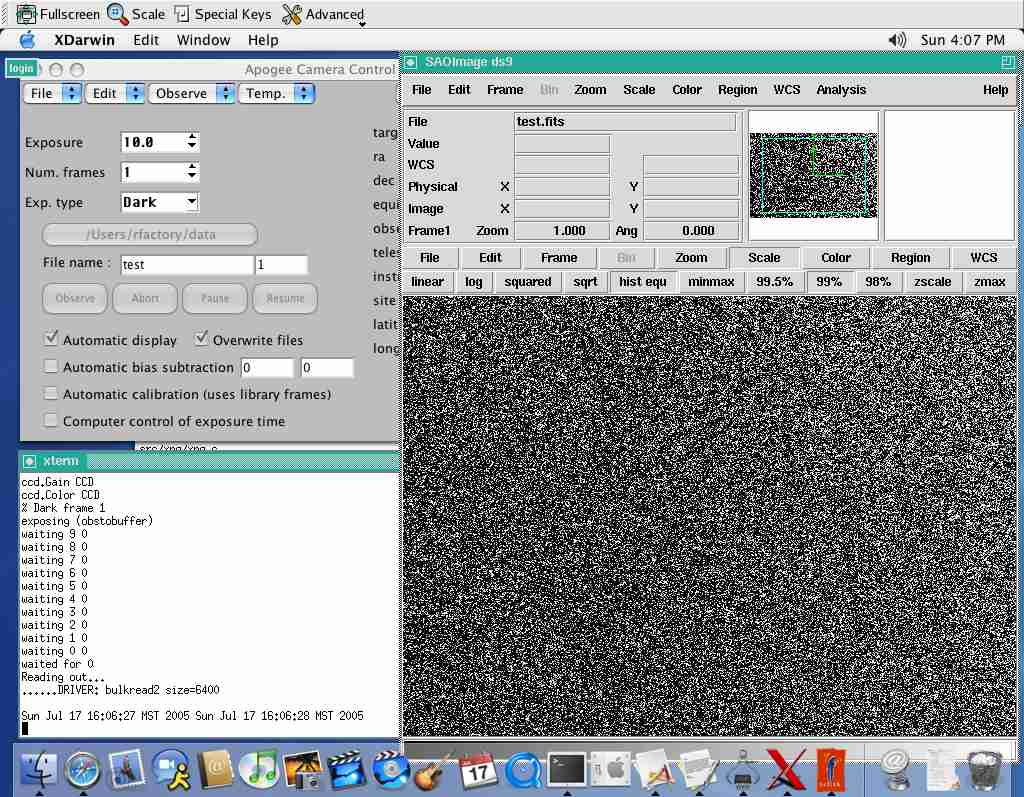
Once the readout completes, the image is automatically
displayed
in the DS9 viewer. Use the "Scale" button in DS9
and
then select "hist equ" to do a histogram equalization.
Full
documentation for DS9 is available in the /opt/apogee/html
directory,
or online.
This snapshot shows the screen in the middle of a long (100
frames)
calibration run.
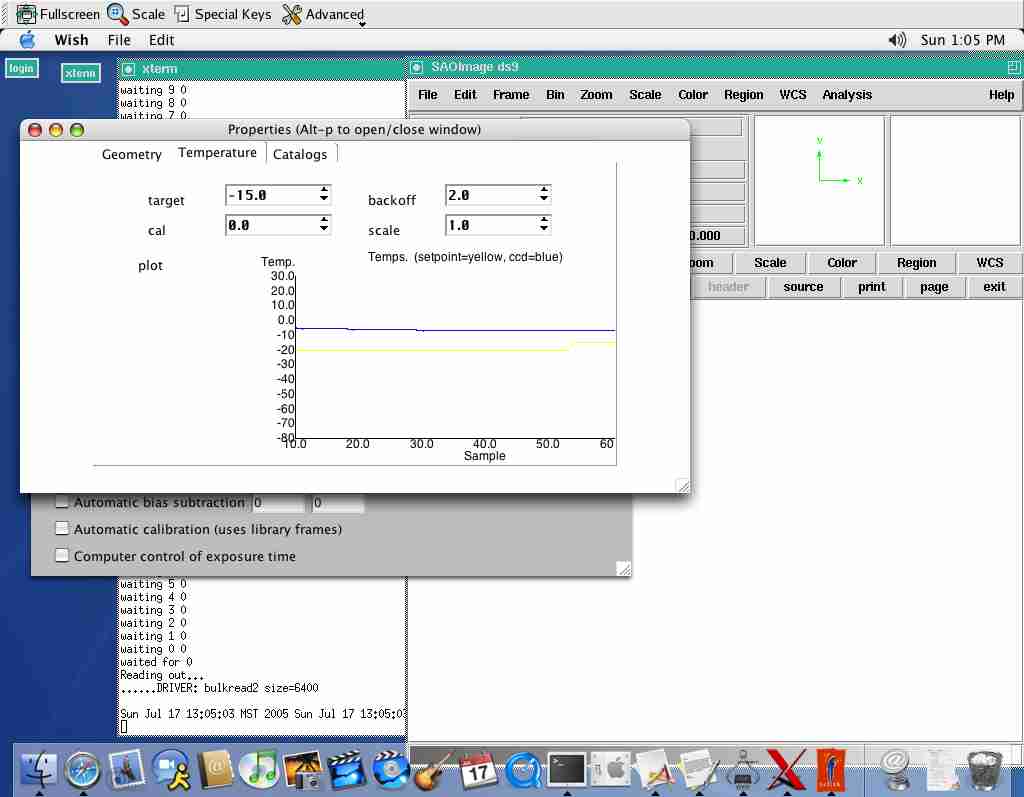
The "Edit" menu provide access to the "Properties"
window.
This window provides lower level control/feedback of the
camera.
The "Temperature" panel of the Edit-Properties menu
item
lets you control the setpoint, and see the Temperature
history graph.
The "Geometry" panel of the Edit-Properties menu
item
lets you control the frame size and binning properties.
It
is usually more convenient to use the Observe menu
to
interactively select ROI's.
Advanced users may wish to explore the capabilities of
the
StarJava image processing and data reduction toolset which
may
be installed from the cd (double-click the starjava.jar icon
on
the installation cd).
The User Guide and Programming manual provide more
detailed
explanations of all the aspects of the user interface,
and the
embedded scripting commands available (some tcl/tk
expertise
is advisable).
The ALTA-E series cameras operate over standard ethernet
and
may require you to temporarily alter the IP address of
your PC
during configuration (if you have no DHCP server).
Log in with the username you will use to operate the camera, and type
/opt/apogee/scripts/altaDiscover
A small window will appear logging progress of the search.
The camera obtains its IP address from a DHCP server on your local
network.
This means that every time the camera is powered on
it
may obtain a different IP address. In this case you will have
to run
/opt/apogee/scripts/altaDiscover
again each time.
To avoid this you can configure the camera to have a static IP address.
Run altaDiscover once to obtain the current address. Then start a webrowser and navigate to
http://address-reported-by-altaDiscover
The cameras onboard webserver shows a welcome page.
Choose the
"Configure Network properties" option.
Use a username of
"admin" and password of "configure"
to access
the page.
Disable the DHCP option, and then enter the cameras
IP address
in the appropriate box.
Use the same network mask and gateway
settings that
were reported on the welcome page.
Then click
"Commit" to save the settings.
Once you have setup the camera with a static IP address,
it is
also a good idea to enter this address into the
hosts database on
your machine.
For example, if the IP address is 192.168.0.100, then add the following line to /etc/hosts (as root)
192.168.0.100 alta alta.localdomain
The Mac OS X version of the ALTA drivers are developed with
the
support of Apogee Instruments Inc. Development and support is
provided by The Random Factory and questions about the
software
should be addressed to them in the first instance.
The Random Factory P.O. Box 44070 Tucson AZ 85733-4070 Tel: +1 (520) 822 5221 Fax: +1 (520) 822 5223 email rfactory@randomfactory.com / rfactory@theriver.com url http://www.randomfactory.com/apogee-osx